This article covers the following topics:
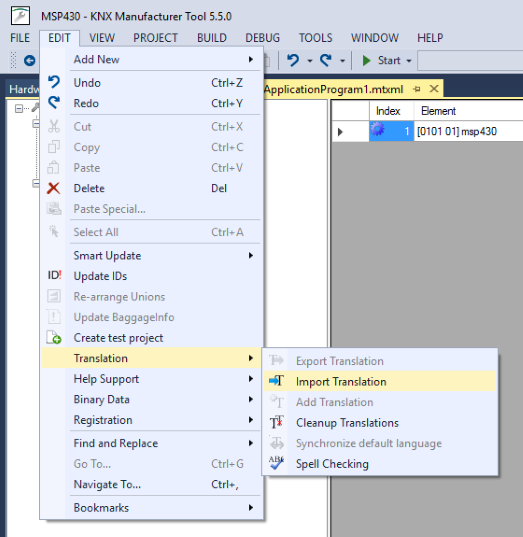
1. Go to the 'Translation' menu from the main tool bar by clicking 'Edit-->Translation-->Import Translation'
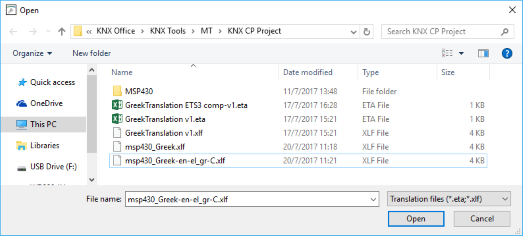
2. Then you will have to select the file where the translations are in and press 'Open'.
3. Once selected, then you will have to select the following options:
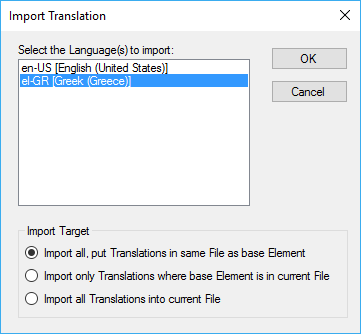
- Language(s) to be imported: Where you can select whether all the languages contained in the translation file shall be imported or some of them (for multiple selection select one, press and hold the 'CTRL' button and then select/deselect the rest.
- Import target: There are 3 different options here:
-
Import all, but Translations in same File as base Element: This will import all translations, but they will be written to the Product Data files (e.g. Application Program, Catalog, Hardware) where the referred elements are located, which is also the KNX Association recommendation.
-
Import only Translations where base Element is in current File: This will only import the translations referring to elements contained in the currently open Product Data file (e.g. only the Application Program).
-
Import all Translations into current File: This will import all translations into the currently open Product Data file, which is not recommended.
-
When the above options are selected, you have to press the 'OK' button. This is will start the import process, which make take a while depending on the size of the translations file to be imported. Furthermore, the import function will overwrite any existing translated texts in the selected languages. If one of the language(s) to be imported is the 'Default language' of the Product Data file (e.g. Application Program, Product, Catalog section or Catalog item), then also the texts that are contained in the element will be overwritten.
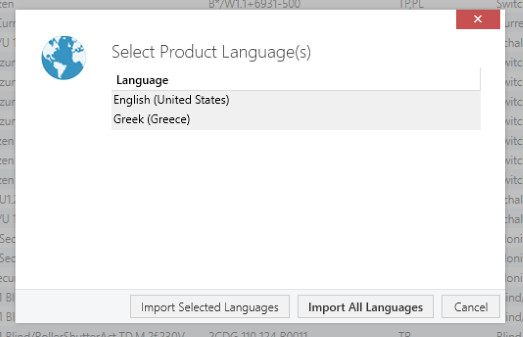
4. Once you select the items and you press the 'OK' button, you will see the new language shown under the 'Languages' section.
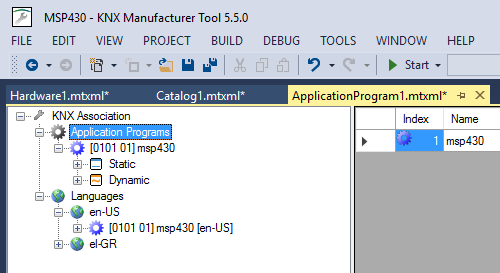
Now, you have one new available language for your product.
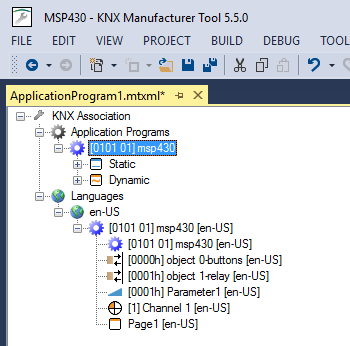
2. Synchronize the default language

Each Product Data file (.mtxml) (e.g. Application Program.mtxml, Hardware.mtxml, Catalog.mtxml) has a 'Default Language' that has to be defined when creating it. This is the language of all user-visible texts directly entered in the Product Data file elements. To avoid exporting the 'Default Language' for translation and importing it back, you can simply perform the 'Synchronize default language'.
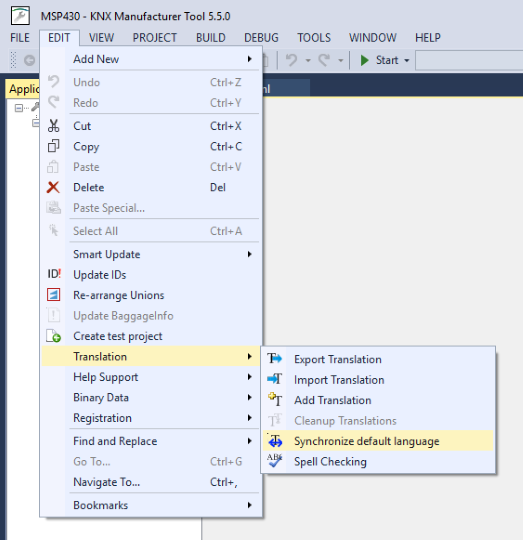
To do so, select the respective element (e.g. Application Program) and then go to the 'Translation' menu from the main tool bar by clicking to 'Edit->Translation->Synchronize default language'. This operation is performed on the currently selected element(s) and their translatable child elements. By doing that, all the texts that exist in the elements will be copied to the corresponding 'Translation' of the default language. This function reports also any differences and offers to synchronize in both directions.
The first time that you synchronize the default language, Manufacturer Tool will give you the following warning:

Where (1) is the selected element (e.g. Application Program) and (2) the specified default language of the element. By confirming the action, Manufacturer Tool will create the respective translation unit below the selected elements. This may take some time depending on the size of the Product Data file; the bigger it is them more time it takes to synchronize the content.
Finally, the default language is also available as translation for the selected element.
Do not forget to repeat the 'Synchronize default language' for all the Product Data files (e.g. Application Program, Catalog, Hardware).
If you are planning to translate your Product Data files using Manufacturer Tool and not any other external translation or text editing software, then you can use the option 'Add translations', which can be found here: 'Edit-->Translation-->Import Translation'. Therefore, if you are planning external translations via export/import translation this function is not needed.
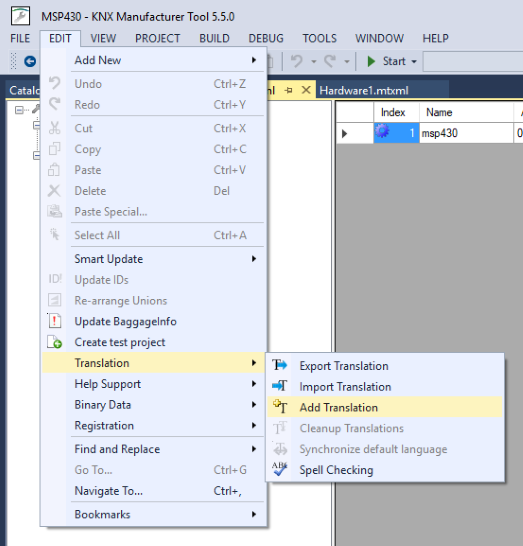
This function adds empty translation for a new language, as well as missing translation units, translation elements and translated text elements for existing translations. Once the option 'Add Translation' is pressed the following options have to be selected:
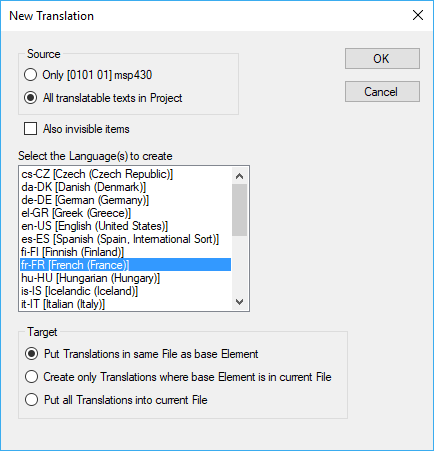
Regarding the content of the file containing the translations, the available options are:
- Only the selected unit (Application Program, Product, Catalog Section or Catalog Item)
- Or 'All the translatable texts in Project'
- Export also invisible items (items that are not visible in the user interface)
Then you will have to select the 'Language(s) to create'.
The dropdown menu shows only the ETS available languages.
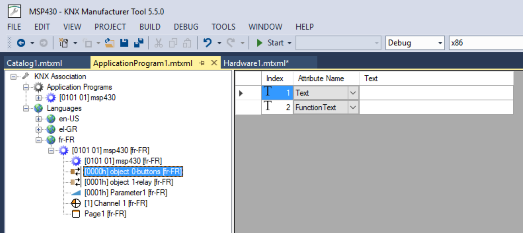
The target defines how you would like the translations to be deployed in your project. See here. Below, you see the result of adding 'French' as language. You have the new language, but no translation available. You can now add translation manually in the 'Text' field as shown below.
Now, the product translations are ready. Whenever you build your product in the Manufacturer Tool the product will contain all the added languages. Below you see that when you import this product in ETS you will see that there are 2 available languages.